|
Some foods come with a regional pedigree and an experience that can’t be replicated elsewhere. Hofbrau Dunkel beer tasted the best best when I was drinking it with two thousand raucous Germans at a beer garden in Munich. I’ve gone out for Middle Eastern food several times since returning from Iraq, but restaurant hobus (flatbread) has never had the mildly crisp outside, doughy interior, and slight smokiness of the bread that Iraqi women handed to us straight from their outdoor mud ovens. Sarah and I eat out to experience flavors that we can’t create at home, but our home cooking is the gateway to flavors--and a satisfaction—that no chef can give us. Sarah made carbonara last week with guanciale that she cured, bacon that I smoked myself, and eggs—with sunset-colored yolks—so fresh they were still warm from the nest box. Food historians debate the origins of carbonara, but I think the intent behind the dish was a quick-to-make meal with ingredients commonly available to Italians at the time—fresh eggs and cured pork. You can debate the authenticity of carbonara made in a Wisconsin farm kitchen, but I think ours is truer to the dish’s intent (and tastier) than one we could order in a local Italian restaurant anyway. It’s the same with cassoulet. The French can’t agree on what makes a proper cassoulet. Julia Child says as much in Mastering The Art of French Cooking: “The composition of cassoulet is, in typical French fashion, the subject of infinite dispute… arguments about what should go into this famous dish seem based on local traditions.” Restaurant cassoulet might be tasty, but it won’t be true in the spirit of the dish. In The Third Plate, chef Dan Barber admits that even farm-to-table restaurants like his are guilty of “cherry picking ingredients”. Cassoulet was a peasant dish, a one-pot meal. Having grown up around more than a few frugal farm cooks, I think the real tradition behind cassoulet was about the cook making a good meal by making do. Making a cassoulet with beans and whatever meat you have on hand can give you a delicious meal, truer to the dish's origins than any restaurant version. Sarah’s version uses three kinds of pork because that’s what we had in our kitchen freezer. The recipe is a guideline, not a rule. Sarah’s Cassoulet (AKA clean-out-the-refrigerator)
Julia Child recommends that you make cassoulet in stages as you have time. Like so many stews and bean dishes. this one is better when it's cook a day or two ahead of time and then reheated before serving. The flavors well meld over time.
0 Comments
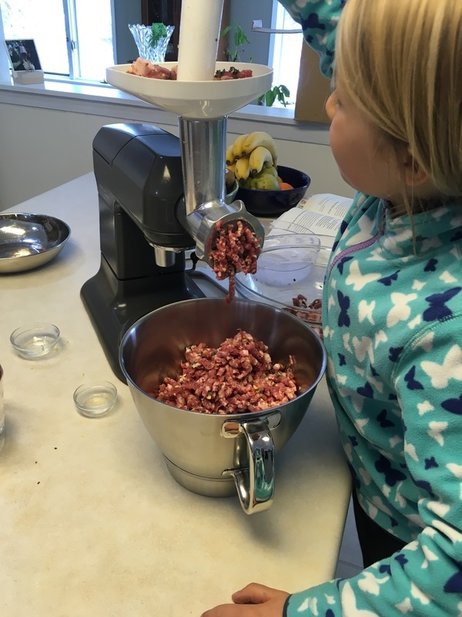
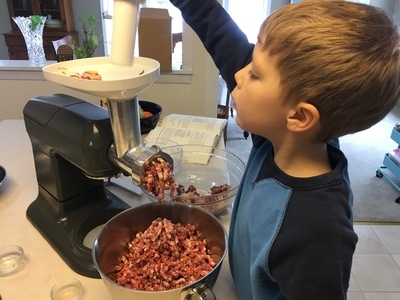
We like the breakfast sausage we get from our processor, and we’ve had several compliments on it. Like so many things in life, though —especially in the world of food— the greatest flavor and satisfaction come from what you can do in your own kitchen. Our favorite breakfast sausage recipe comes from Charcuterie by Michael Ruhlman & Brian Polcyn (it’s also my go-to reference for curing and smoking meats).
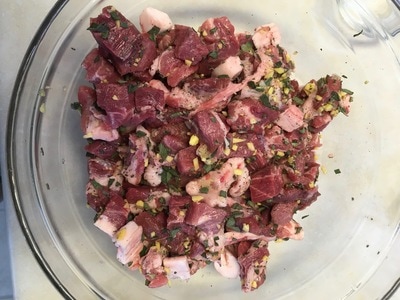
Breakfast Sausage With Fresh Ginger And Sage: 5 Lbs Boneless pork shoulder 3 Tbs Kosher Salt (recipe written for Diamond Crystals Salt. Salt brands vary in salinity, so the brand makes a difference) 5 Tbs finely grated fresh ginger 5 Tbs tightly packed, finely chopped fresh sage (If you have dry sage, use a ratio of 1 part dry to 3 parts fresh. I used 1.5 Tbs of our own dried sage) 1 Tbs minced garlic 2 tsp ground black pepper 1 cup ice water A note about being a cool sausage maker: Keeping everything cold is one of the keys to making good sausage with that perfect texture of fat and meat. If the meat and fat get warm in the process, you get a mushy mess from softening fat. We notice the difference in texture when we cook sausage that got too warm while grinding. You need cold ingredients but also a cold grinder to do this well. We like to make sausage in winter for this reason. Our grinder is an attachment on the front of our stand mixer. (Don’t gasp, I own a hand cranked one too). Not only do we chill the meat, we set the mixer’s bowl and grinding attachment in the snow to keep them cold since grinding will build up some heat from the friction. For really large batches, I’ve pushed snow through the grinder every so often to keep it cold. 1. Combine all the ingredients except the water and toss to distribute the seasonings. Chill. 2. Grind the mixture through a small die into a bowl set in ice (their directions -an alternative to our technique of chilling the stainless mixing bowl in the snow) 3. Add water to the meat mixture and mix with the paddle attachment or a sturdy spoon until the liquid is incorporated and the mixture has developed a uniform, sticky appearance. 4. Saute a small piece of sausage to taste test. (Their next instruction goes into stuffing casings. We don’t bother. We measure out 1 lb increments and wrap them in butcher paper to store in the freezer.) When cooking, gently saute the sausage to an internal temperature of 150 degrees F. I make patties and cook them just to the point of browning while still yielding to the touch. It’s a hit with our kids and brunch guests. “Craft must have clothes, but truth loves to go naked.” —Thomas Fuller
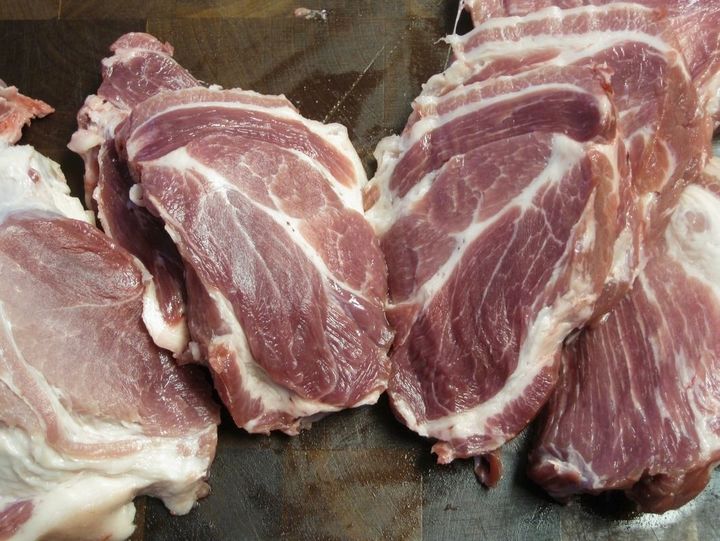
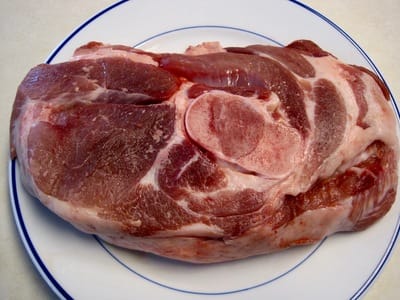
If you really want to taste-test a piece of meat, try it naked. (The meat, not you. Don’t dine naked. That’s just weird. I shiver at the thought —my basement office is cold.) Let me clarify “naked”: No sauces, brines, braising in wine, etc. Your total ingredient list after meat is salt. Add pepper if you want to make your naked fancier. Apply heat. That’s it. I recently mentioned the “naked test” to Shane Graybeal, the Executive Chef at Sable Kitchen and Bar in Chicago. “When do you ever see anyone just salt and sear a pork chop?” I asked. He considered the question for a few seconds. “Man, that only works with top-notch ingredients,” he said. Shane explained that his cooking style has moved in that direction over two decades. Instead of working so hard to find new flavor combinations, he’s making simpler (and better in his implication) dishes but with the best ingredients he can find. High quality ingredients taste great on their own. If you have ever had corn-on-the-cob picked out of the field fifteen minutes before lunch, you know what I mean. The reason we don’t see a lot of simple pork dishes is that mediocre meat doesn’t fare so well naked. Four-plus decades of CAFO (confined animal feeding operation) pork flooding the market turned pork into “the other white meat” —dry, grainy, flavorless, white meat. An animal’s diet, living conditions, and treatment—up to the moment of slaughter—directly impact the meat’s quality and flavor. Lock a pig in a stall and feed it the same bland corn-and-soy ration and you get grainy, flavorless protein. Since that dry, white meat soaks up any flavor like a sponge, chefs and home cooks found more ways of soaking, smoking, and saucing pork so we can taste something. I’m guilty of that too. I post certain recipes on the blog because they interested me and we liked the results. A lot of my cooking is bare-bones though: slice a squash and roast it, bake a potato, steam a vegetable, grill the meat. I’ve been cooking like that since college, but now that we are raising much more of our own food, my simple fare fares much better. A couple weeks ago, I pan-seared a naked pork chop for lunch just to test my own product. I enjoyed it so much that I cooked the same lunch again for the next two days. While looking through cookbooks for this post (see note at bottom), I did find a very simple recipe for “Perfect Pan-Seared Steak” by J. Kenji Lopez-Alt in the Food 52 Genius Recipes by Kristen Miglore. The techniques are similar to something I read in Cooks Illustrated magazine several years ago. What’s below is a simplified adaptation. Naked Chops: Pork Chops at least 3/4 inch thick (It’s hard not to over-cook a thin cut of meat). Kosher Salt A neutral cooking oil or lard. Pepper (optional) —Rub chops liberally with salt (and pepper if you must complicate things) and let sit for a few minutes. (The recipe says 40 min and up to 3 days in the refrigerator. The longer it sits with the salt rub, the closer you are getting to brining. I let mine sit for less than 10 minutes because I was hungry for lunch.) —Heat oil in a heavy skillet (I use cast iron) until it’s almost smoking. (The recipe says “smoking heavily”, which assumes you have an industrial exhaust hood or at least a good one that vents outside. We don’t.) —Hold the chops with tongs and sear the edges first, which makes the fat crispy and renders some in the pan for the chop to cook in. —The recipe says to flip the chops with tongs every 15-30 seconds. I haven’t tried that yet (because I saw this recipe after I cooked my chops). This lets each side get a a few rests from the heat and results in a more evens-cooked, tender chop. —Pull the chops while the meat still yields easily to the touch or a meat thermometer reads 145 degrees F. This is critical. One of the longtime abuses of pork has been overcooking. See Bourbon Brined Pork chops for an explanation. —Let the meat rest under foil for at least 5 minutes before serving. Cooked this way (and not over-cooked), great meat, like great whiskey served neat, will reveal its rewarding flavors. Side Note: I grabbed a few cookbooks off the shelf to compare the amount of space dedicated to meat recipes: The 1959 Farm Journal Cookbook is 420 pages. Only 39 of those pages (9%) covered beef, poultry, and pork combined. I’m guessing they assumed that their audience knew how to fry stuff, because it’s barely mentioned. Most of the pork recipes focus on glazed hams and ham leftover recipes. Cooking with Julia is 512 pages. 132 pages (25.7%) cover recipes for beef, pork, and poultry. Essential Peppin is 684 pages. 156 pages (22.8%) are dedicated to meat, including offal. Food 52 Genius Recipes is 251 pages. 44 of those (17.5%) are for meat. My ten minutes of research doesn’t prove anything, but I wonder what the breakdown of meat recipes is for other older cookbooks? If you have some pre-1960’s cookbooks, let me know what you find. —A recipe and a few explanations with no apologies for being cheeky. Thanks to the cut’s name, I’ve had several questions and a few teases about “pork butt”. It’s actually part of the shoulder, i.e., the front leg. The entire piece can be described as the shoulder. The upper part, near the blade—flat bone—is called the butt, and the lower part, around the shank —round bone—is the shoulder. The cut is also called Boston butt. Why a pork cut sounds like the derriere of a Patriots fan, I don’t know. Why not Green Bay butt? At least that football team's name originates from a bunch of burly meat cutters. The term butt goes back to Middle English, where it refers to the broadest part of something, such as the butt end of a log (the flare near the ground) and later, the butt stock of a rifle (the wide part that you place in your shoulder. ). Hence the term later became slang for the widest part of some people (often in front of me at the Farm & Fleet checkout. See reference to Green Bay butt). This recipe for pork stew with fennel, orange, and olives comes from "vvvanessa" on Food 52. I substituted pork butt—which you can do with almost any pork shoulder recipe (at least I haven't found one yet that doesn't work). Start by cutting the meat into 1" cubes. If possible, take a cue from the woodworking world and make your lengthwise cuts first and then cut those pieces into smaller chunks. It saves you knife (or saw) strokes. A few notes:
The author serves it over polenta. I served it over rice. I would have preferred polenta, but I hadn’t ground any of my corn into meal yet (I don't hand-harvest heirloom varieties of open-pollinated corn just to feed it to hogs. I finally ground some a few days after making this recipe. Wonderful smell and flavor in the cornbread, but that's another post.) I left out the celery and bay leaf because I didn't have them on hand. I used extra fennel, which I prefer to celery. Can't say I missed the bay leaf. Never have. If anyone can show me a recipe that is definitively changed by the token bay leaf, I'll give you a free pork shoulder or butt. I cooked the stew as low as I could for 90 minutes, turned it off, went to pick up the kids, ran errands, yadda-yadda and then reheated it 90 minutes later. I swear that the rest-and-reheat period makes a difference. I don’t have any pics of the completed recipe. When the kids are hungry and Sarah may or may not be home from work yet, “I should get my camera” isn’t in the front of my mind. It's dinner on the table and soon gone. If you want to know how good it looks and tastes, get some good pork butt (let's just say I know a source) and try it for yourself. (And you too can brag about having the best butt in your kitchen). This time of year, when I’m not working outside all day, I like to prep dinner in the late morning/early afternoon, chuck it in the oven, and forget about it for a few hours. This front-loads the work when the kids are a) still at school, or b) home but able to play without the decisive dad ref-ing that seems most in demand near the dinner hour. Then, when darkness falls so early in the evening and we all want to hunker down in front of the fireplace, a warm, hearty meal isn’t too far away.
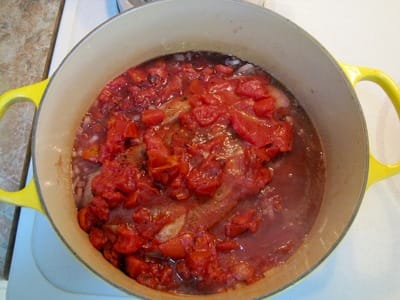
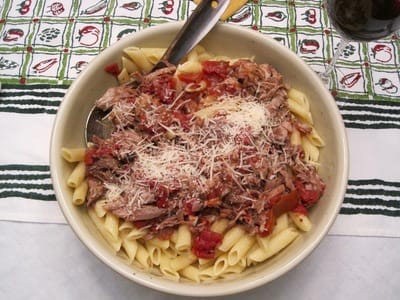
When I asked Sarah for suggestions for a good pork shoulder recipe, she pointed me to Jenny Rosenstrach’s Dinner -A Love Story. Jenny’s Pork Shoulder Ragu with Pappardelle makes a wonderful winter meal. The recipe calls for 2-2-1/2 lbs of pork shoulder. Since I had a 3-1/2 lb shoulder, I diced up a softball-sized onion, and topped the meat with plenty of wine. That’s the beauty of braising —you add enough liquid to keep the meat moist and it’s hard to screw up. I put everything in the oven, and then made lunch for the kids. Recipe here Three hours later, I pulled the roast and let cool in to pot on the stovetop. The recipe has you pull shredding the meat with two forks while it’s still hot, but if you want juicier pork, let the meat cool enough to touch it and it will absorb more of the liquid. I prefer to shred the meat (it mostly falls apart on its own) and let it sit in the liquid for a while before serving. Dishes like this are even better if you refrigerate them overnight and reheat them to eat the next day. At 5 pm, I put on water on to boil for pasta and warmed up the meat—still in the pot—on the stove. It’s not often that I impress my wife and kids with my cooking, but this dish got compliments all around. Our son, Karsten, has two smiles—the I’m-completely-full-of-it-but-let’s-all-pretend-I’m-not smile and the earnest smile. He’s also our family’s picky eater (this is relative, my kids eat braunschweiger). “Dad, this isn’t good,” he said, pausing with the facetious smile. “This is fabulous.” Fabulous was a little over-the-top, but he kept nodding with the earnest smile. |
Ryan Erisman
Former Marine Infantry Officer. Iraq Vet. Interested in Regenerative Agriculture at any scale. Archives
February 2023
Categories |
Odyssey Farm, LLC.
The Odyssey Farm Journal
Odyssey Farm, LLC
|
Dane County Climate Champion
|
608.616.9786
|
Copyright © 2016
 RSS Feed